

23 May 2012
Megan Miller, Ciaté & Hot Topic Nail Polish Bottles
I recently discovered Megan Miller nail polishes, have you ever heard of this brand? Yeah, it's quite new to me as well and I'm happy that I recently discovered it ^^. Can't wait to get my hands on one of these! Have you seen their unique nail polish bottles ^^?! It looks so cute and it just gives you a summer feeling when looking at it ^___^! Totally love it!
23 March 2012
Swatches: Bourjois Paris Sucré Nail Polishes 25 and 26
Bourjois Paris has a new collection which is called Paris Sucré. It's a collection which is inspired by all the nice sweets that you can get in Paris, like macaroons, cupcakes and ice cream. You will find a lot of pastel colors in this collection which will make you think of Spring! I can't wait until the sun is shining again! I recently received two nail polishes of the Paris Sucré collection which is #25 and #26, today you will see some swatches of these nail polishes.

10 February 2012
Essie Swatch - French Affair
I don't have many Essie nail polishes in my collection, this is probably the second one. I bought this while I was in Hong Kong and it was around 60 HKD? or something, I forgot the exact price hehe. Anyways, I would like to show you some swatches of this Essie nail polish which is called French Affair.

16 December 2011
China Glaze - Icicle #1023 Swatch
In today's blogpost I'm going to show you a China Glaze nail polish swatch which is called Icicle #1023 from their Let it snow holiday collection 2011.

Have you missed my previous China Glaze Swatches?
- Snow Globe #842 swatch
- Winter Berry #1018 swatch
- Blue Years eve #1021 swatch
28 November 2011
China Glaze - Blue Year's Eve #1021 Swatch
Today I'm going to show you some swatches of the nail polish: Blue Year's Eve #1021 from China Glaze. This is one of the nail polishes which is in the Let It Snow Collection 2011. Looks like a pretty blue right ^^?

Have you missed my previous China Glaze Swatches?
- Snow Globe #842 swatch
- Winter Berry #1018 swatch
14 October 2011
China Glaze - Let It Snow Holiday 2011 Collection
Have you seen the latest China Glaze nail polish collection? It's called the Let it snow holiday 2011 collection and it was launched a month ago, September 2011. China Glaze introduced 12 nail polishes in this collection. These were specifically created with the winter season in mind and you can definitely see that in this collection. In this blogpost I'm going to show you the whole collection, the swatches will be posted soon. Below you will see some close ups/quick views of the nail polishes. There are mostly traditional holiday shades but some very interesting ones as well, like the glittery nail polish, Tinsel Town! Which nail polish do you want me to swatch first ^___^?

22 October 2010
Crackle nail polish
Have you heard of this already? It's the latest nail polish trend: Crackle nail polishes. There aren't many nail polishes yet with the crack effect. I haven't tried it, but would love to if its available here. It is different than the normal polishes. I actually don't think its pretty, but it made me curious, because its something different than we are used to =p I found this video on youtube, just watch and you can really see it crack xD.
She's using BarryM Instant Nail Effect polish.
How to create this effect?
Step 1: You need to put on a base coat (let this dry)
Step 2: Apply a light colored nail polish (let this dry)
Step 3: Apply the crackle nail polish and see the effect (let this dry)
Step 4: Apply a top coat (let this dry)
There are also crackle top coats available of the brand P2.

She's using BarryM Instant Nail Effect polish.
How to create this effect?
Step 1: You need to put on a base coat (let this dry)
Step 2: Apply a light colored nail polish (let this dry)
Step 3: Apply the crackle nail polish and see the effect (let this dry)
Step 4: Apply a top coat (let this dry)
What do you girls think about this nail polish trend :) ?

06 October 2010
Creative black tips, Nail art tutorial

Another nail art tutorial ^_^ and this time its a very simple one~!
All you need is: a base coat, top coat, black nail polish and a glittery grey nail polish.
Here we go ~
Step 1: Apply a base coat and let it dry.
Step 2: Apply black nail polish on all your tips, try to put a straight line on the tips. Let this dry.
Step 3: Randomly add lines with your glittery nail polish.
Step 4: When its all dry, apply the top coat.
I´ve used a multi glitter tip painter of Essence (grey) and a black tip painter of Essence.
And voila you're done ^_^ easy right?

18 August 2010
BB nail art tutorial
Hello everybody^^ it has been a while! How have you guys been? I'm so happy to blog again!!! Sorry for not posting anything these few days. As you could see at some of my previous posts, I was extremely busy with my thesis >.<, therefore I didn't have the time to update my blog. Yesss.. got a lot of stress =( *sigh I had handed in my thesis today, so I have a bit more time now. And I wanted to share a nail art today^^!
A small bag which I bought in Hong Kong last year, isn't it cute? It matches my nails ^^ hihi.
I call it the baby blue (BB) nail art


BB Nail art tutorial:
Step 1: First of all I putted a base coat on my nails.
Step 2: I polished the tips of my nails with a baby blue nail polish
Step 3: I started to put some white dots on the tips of my nails with a toothpick.
Step 4: After that I used a glittery nail polish to create the line under the tips.
Step 5: Added a top coat after that, and voila ^^!
Nail polishes which I used:
I used a baby blue nail polish of the brand C&B
A white nail polish of Dear'Lee to create the dots
Glittery gray nail tip of Essence
Top coat of China glaze (I really like this top coat btw. ^^ it dries fast!)

So, what do you think? I Hope you like it :) !
A small bag which I bought in Hong Kong last year, isn't it cute? It matches my nails ^^ hihi.

I call it the baby blue (BB) nail art


BB Nail art tutorial:
Step 1: First of all I putted a base coat on my nails.
Step 2: I polished the tips of my nails with a baby blue nail polish
Step 3: I started to put some white dots on the tips of my nails with a toothpick.
Step 4: After that I used a glittery nail polish to create the line under the tips.
Step 5: Added a top coat after that, and voila ^^!
Nail polishes which I used:
I used a baby blue nail polish of the brand C&B
A white nail polish of Dear'Lee to create the dots
Glittery gray nail tip of Essence
Top coat of China glaze (I really like this top coat btw. ^^ it dries fast!)

So, what do you think? I Hope you like it :) !
04 August 2010
Streetstyle nail art tutorial

First of all clean your hands, put one layer base coat on your nails and let it dry. What you need for this tutorial is a green, pink and glittery nail polish. AND a small sponge. Remember the sponge nail art tutorial: http://memorabledays-x3.blogspot.com/2010/06/sponge-nail-art-tutorial.html
Step 1: I'm going to use the sponge method again ^^. So put a little bit of green nail polish on your small sponge and dap the sponge on the tips of your nails. Do this to all your nails and let it dry.

Step 2: Use a clean side of your sponge and put a little bit of pink nail polish on it. Dap the sponge with the pink side on the tips of your nails and let this dry.
Step 3: Put some glittery nail polish on the tips of your nails and let it dry.

Step 4: Put a top coat on your nails and you're done :)

What did I use?
♥ Catrice sold out forever; http://memorabledays-x3.blogspot.com/2010/07/catrice-240-sold-out-forever.html
♥ C&B pink nail polish
♥ Glittery tip painter of Essence (pink)
Hope you liked it :), if you have any requests, feel free to email me ~ If you want to see my other nail art tutorials (such as my dollywink inspired nail art tutorial), click on TUTORIALS down here at the labels :)
25 July 2010
Catrice nail polish #240 Sold out forever


I can still remember that everybody was looking for this green nail polish of Catrice, because it looks like the nail polish of Chanel. But I do like this color, its a pretty pastel green, very suitable for the summer. It really is a must buy item for the summer!
Just like all other Catrice nail polishes, the brush is thick and large (which I don't like). The nail polish is also quite thick, but you still need to put two layers to make it pretty :)
Check out the other polishes of Catrice:
- Catrice; Just married
- Catrice; From dusk to dawn
04 July 2010
Dolly Wink inspired nail art tutorial~
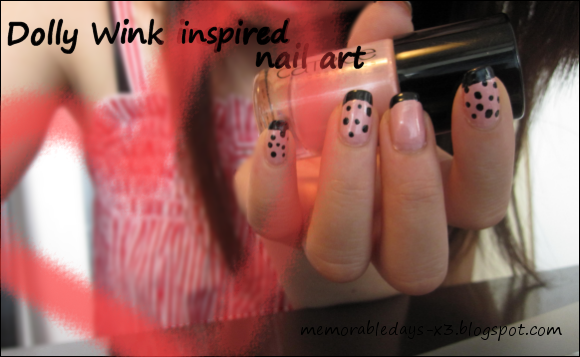
You can do this in 6 simple steps:
Step 1: Apply a base coat on your nails and let it dry.
Step 2: Apply a pink nail polish (1 coat) if your pink nail polish is thick, if its not apply 2 coats.
! Notice: BUT don't polish your whole nail, leave the top space open (look at my thumb).
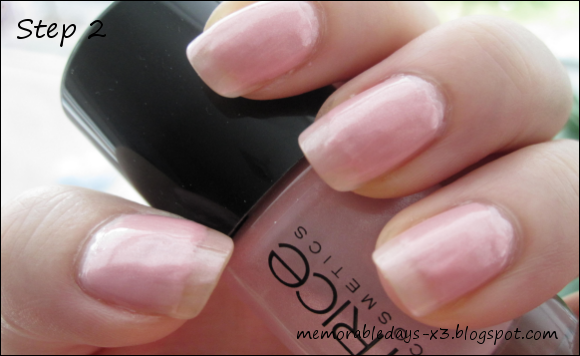
Step 3: Apply a black nail polish at the top space of your nails (1 coat if your black nail polish is thick, otherwise apply 2 coats)
Step 4: Apply dots with your black nail polish, leave the middle finger open.
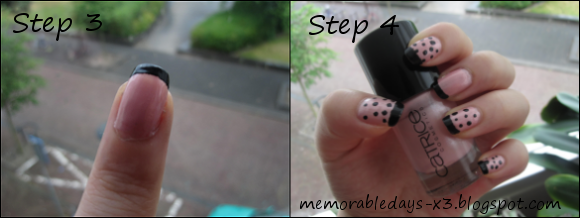
Step 5: I added a small bone on my middle finger and 3 dots.
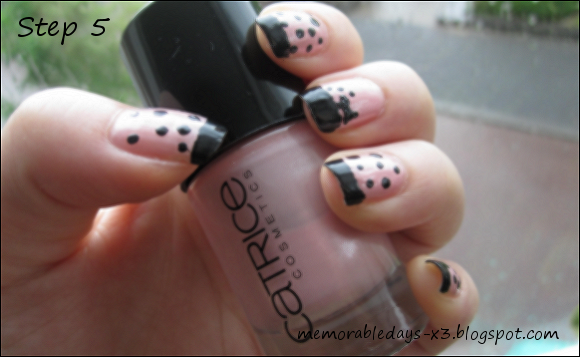
Step 5: Or you can just leave it open :).
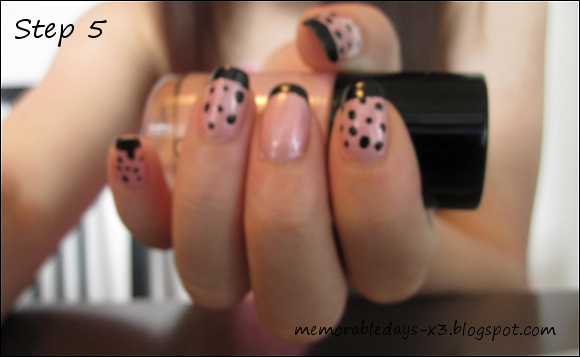
Step 6: Wait till its dry and apply a top coat.
And you're done :)
What did I use?
♥ Catrice nail polish , 210 just married (you can win the product in my give away)
♥ Dear' Lee black nail polish
Any questions?
Leave a comment at my comment box or you can email me ^-^!
01 July 2010
Tsubasa Masuwaka Nail Polish collection
The eye lash collection: http://memorabledays-x3.blogspot.com/2010/06/tsubasa-masuwaka-dolly-wink-1.html
The nail polish collection of Tsubasa Masuwaka is (almost) in stores! Pictures are revealed on the website and through twitter :)

Super cute =D
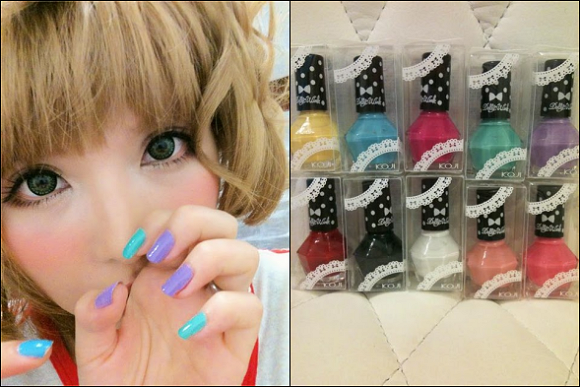
Lovely colors for the summer!
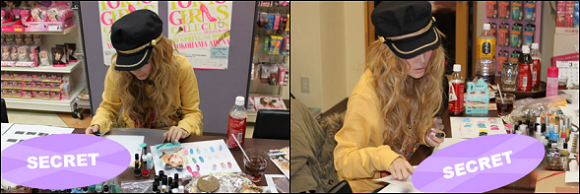
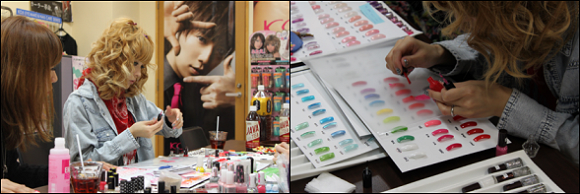
Source: koji-honpo.co.jp/tsubasa
The nail polish collection of Tsubasa Masuwaka is (almost) in stores! Pictures are revealed on the website and through twitter :)
Super cute =D
Lovely colors for the summer!
Source: koji-honpo.co.jp/tsubasa
15 June 2010
Sponge nail art tutorial
I had never used a sponge before for nail art, but I wanted to try it out.
First, clean and wash your hands, let it dry and apply a good base coat on all your nails :) Ok, let the base coat dry first. When its dry, follow the following steps:
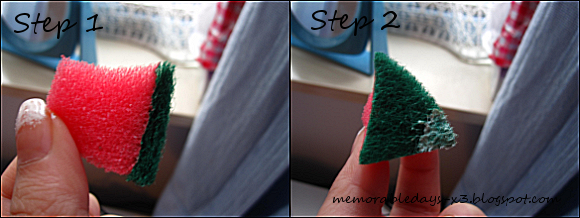
Step 1: Grap a clean sponge and cut the sponge into small pieces. You only need one piece.
Step 2: Apply some white nail polish on the sponge ( not too much, otherwise you won't get the sponge effect)
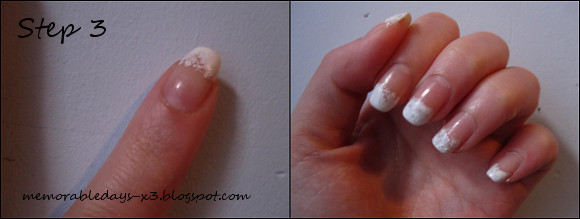
Step 3: Dap the sponge on the tips of your nails. Do this to all your nails and let it dry. Can you see the sponge effect?
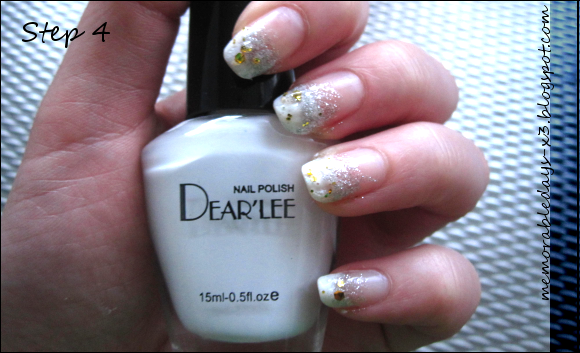
Step 4: Apply some glittery nail polish on the tips of your nails and let it dry. I have used the colors gray and yellow.
Step 5: Apply a top coat and you're done =D!
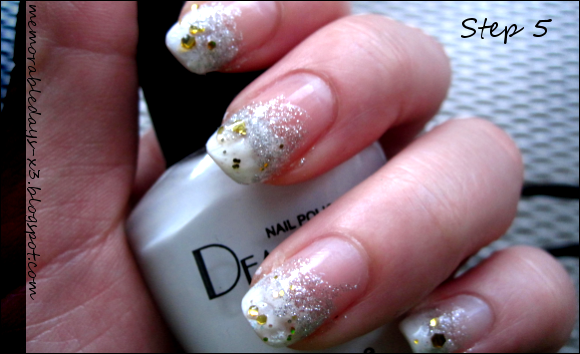
I have used a white nail polish of the brand: Dear'Lee and glitter gray and glitter yellow nail polish of Catrice.
First, clean and wash your hands, let it dry and apply a good base coat on all your nails :) Ok, let the base coat dry first. When its dry, follow the following steps:
Step 1: Grap a clean sponge and cut the sponge into small pieces. You only need one piece.
Step 2: Apply some white nail polish on the sponge ( not too much, otherwise you won't get the sponge effect)
Step 3: Dap the sponge on the tips of your nails. Do this to all your nails and let it dry. Can you see the sponge effect?
Step 4: Apply some glittery nail polish on the tips of your nails and let it dry. I have used the colors gray and yellow.
Step 5: Apply a top coat and you're done =D!
I have used a white nail polish of the brand: Dear'Lee and glitter gray and glitter yellow nail polish of Catrice.
07 May 2010
China Glaze; 80883 Gussied Up Green
I "borrowed" this nail polish from my sis. gnagnagna ='D. It's a nail polish of the brand China Glaze, which is quite well-known, but I hadn't seen this brand in China though =/ (kinda weird huh?) It's green, but if you look from a distance you will think that it's a black nail polish. I like the effect =). The quality of this nail polish is quite good and it was thick enough, so I didn't need to put two layers^^.


01 May 2010
Catrice; just married

Source: http://www.catrice.eu
Have you seen the newest nail polish line of Catrice? It's called Ultimate Nail Lacquer. Adoring the colors! Everybody is looking for the GREEN version cuz it looks like the one of Chanel. However, it's sold out everywhere!!! I bought ; #210 Just married.
Pros:
+ bright color
+ pretty and stylish package (looks very expensive)
+ not expensive at all , only 2.50 euros or something?
Cons:
- the brush is too thick
- polish isn't thick enough, you have to put 2 layers.

#210 Just married/ What do you think^^ ? You like it?
Subscribe to:
Posts (Atom)