
First, clean and wash your hands, let it dry and apply a good base coat on all your nails :) Ok, let the base coat dry first. When its dry, follow the following steps:
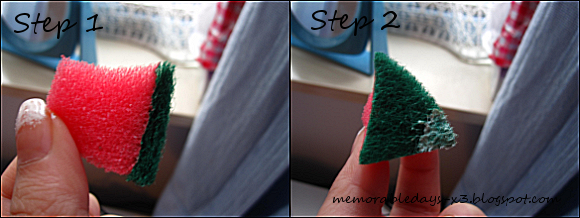
Step 1: Grap a clean sponge and cut the sponge into small pieces. You only need one piece.
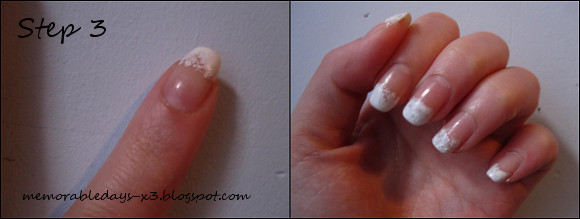
Step 2: Apply some white nail polish on the sponge ( not too much, otherwise you won't get the sponge effect)
Step 3: Dap the sponge on the tips of your nails. Do this to all your nails and let it dry. Can you see the sponge effect?
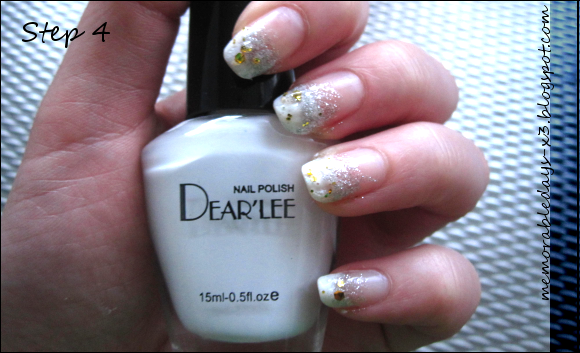
Step 4: Apply some glittery nail polish on the tips of your nails and let it dry. I have used the colors gray and yellow.
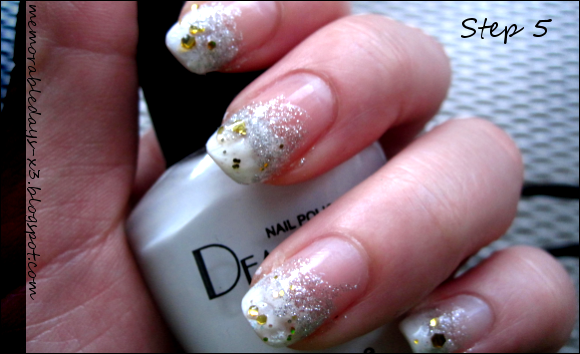
Step 5: Apply a top coat and you're done =D!
I have used a white nail polish of the brand: Dear'Lee and glitter gray and glitter yellow nail polish of Catrice.
I'm in awe right now! I can't do nail art at all... (TT.TT) Esp. like that kind, it looks super complicated. Still, with your tutorial I kinda wanna try it!
ReplyDelete很可爱!〜
♥
wow the way u do ur nails thats really awesome i just gave u a award check it out on my blog
ReplyDeletehttp://kusodaidaiisa.blogspot.com/
nice on that nail art! I like it~
ReplyDeleteahww, thanks =D y'll should try it ^^ it isn't that hard, its actually quite easy =D
ReplyDeleteawesome nails!
ReplyDeletehave to try this too!! :D
woooo prettay 8)
ReplyDeleteYour nails look so pretty! =]
ReplyDeleteawesome nail art! :) i cant do nail art but i really like it! :D
ReplyDeleteyeah hk disney is very small compared to other disney resorts but still fun nonetheless :)